Pests in Your Attic Insulation: 5 Steps to Address the Problem
Key Takeaways
- Mice, rats, squirrels, wasps, and cockroaches can nest in attic insulation and leave behind urine, bacteria, and fungal pathogens.
- Insulation exposed to pest droppings, urine, or nesting debris cannot be cleaned and must be replaced.
- Resolving a pest-related insulation issue involves five steps: eliminating the pests, closing entry points, removing affected insulation, cleaning and disinfecting the attic, and installing replacement insulation.
- A professional pest control company can help address the infestation and identify the steps needed to prevent pests from returning.
Attic insulation helps maintain a comfortable indoor temperature, but it can also provide shelter for unwanted pests. When mice, rats, squirrels, wasps, or cockroaches find their way into your attic, they may nest in the insulation and leave behind waste and other contaminants.
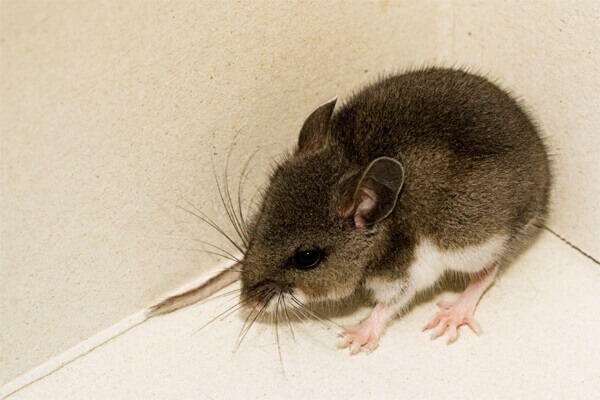
These materials can contain bacterial and fungal pathogens. Pest urine can also contribute to mold growth, and airborne contaminants may spread from the attic into your home’s living spaces, potentially affecting your family’s health.
Unfortunately, contaminated attic insulation cannot simply be cleaned and reused. It needs to be removed and replaced. If you discover signs of pest activity in your attic, understanding how to address both the infestation and the damaged insulation is an important first step.
Can Pest-Contaminated Attic Insulation Be Cleaned?
No. Attic insulation that has been exposed to pest droppings, urine, or nesting materials cannot be cleaned adequately for reuse. The appropriate solution is to remove the contaminated insulation and install new material.
Replacing the insulation is only part of the process. The pests must also be eliminated, their access points addressed, and the affected area cleaned and disinfected. Completing these steps helps resolve the underlying pest problem instead of simply concealing the evidence.
How to Address Pests in Attic Insulation: 5 Essential Steps
Step 1: Eliminate the Pests in Your Attic
Before replacing insulation, make sure the pests responsible for the contamination have been addressed. A qualified pest control company can identify the infestation and help remove the pests safely and thoroughly.
Skipping this step can allow the same problem to happen again. If pests remain in the attic, they may return to the replacement insulation and contaminate it just as they did the original material.
Step 2: Find and Seal Pest Entry Points
Once the infestation has been addressed, determine how the pests entered your attic. Unsealed openings can give mice, rats, squirrels, and other pests another opportunity to get inside.
A pest control company can locate potential entry points and may be able to repair some of them. If the necessary work involves more extensive structural repairs, a roofer or contractor may also be needed.
Closing these access points is an important part of reducing the risk of another attic pest problem.
Step 3: Remove Damaged and Contaminated Insulation
Insulation affected by pest urine or visible staining must be removed and replaced by a professional. In addition to the potential health concerns associated with contamination, pest waste can create unpleasant odors that persist until the affected material is removed.
Taking out the contaminated insulation removes much of the odor and bacteria associated with the affected material. But it has to be done carefully so that the dried urine or feces don’t get into the air and travel through your home. Once a professional has done this, it prepares the attic for the next stage of cleanup and restoration.
Step 4: Clean and Disinfect the Attic
With the old insulation removed, the affected attic space should be thoroughly cleaned and disinfected. But this also should be done by a professional.
This stage helps address remaining contamination rather than leaving it beneath a new layer of insulation. Although cleaning the attic may be an inconvenient part of the project, it is an important step toward restoring the space and it should be done by a professional offering a pest cleanup program.
After a professional has cleaned your attic safely, it’s a practical opportunity to go through stored belongings and clear out items before the new insulation is installed. You might even come across old yearbooks and other things you had forgotten were stored there.
Step 5: Install Replacement Attic Insulation

After the pests have been removed, entry points addressed, contaminated insulation taken out, and the area cleaned, new insulation can be installed.
Proper attic insulation helps keep warm air inside during winter and cooler air inside during warmer weather. Without sufficient insulation, your home’s heating and cooling systems may need to work harder to maintain comfortable temperatures.
That additional workload can increase energy bills and place unnecessary strain on HVAC equipment. Installing new attic insulation completes the process and helps restore your home’s comfort and energy efficiency.
How OPC Pest Services Can Help with an Attic Pest Problem
Finding pests in your attic insulation can raise concerns about contamination, lingering odors, and the possibility of another infestation. OPC Pest Services can help you address your pest control concerns and determine the appropriate next steps for your situation.
Resolving pest-contaminated insulation involves more than replacing the material. The process includes addressing the infestation, identifying and sealing access points, removing contaminated insulation, cleaning and disinfecting the affected area, and installing replacement insulation.
Depending on the work required, you may need assistance from an insulation professional, roofer, or contractor in addition to pest control services. You may also need to clear stored belongings from the attic before the work begins.
Contact OPC Pest Services to discuss your attic pest concerns and learn what steps may be appropriate for your home.
Frequently Asked Questions About Attic Insulation and Pests
Q: How can I tell if pests have contaminated my attic insulation?
A: Several signs may indicate pest activity in your attic. These include a lingering musty or urine-like smell, visible droppings, nesting materials, insulation that appears stained or matted, and noises coming from the attic at night.
A professional pest control inspection can help determine whether pests are responsible and identify which pests may be causing the problem.
Q: What are the rates for attic insulation removal and replacement?
A: Attic insulation removal and replacement rates depend on the size of the attic, the extent of the contamination, and whether structural repairs are necessary to seal entry points.
An assessment of the attic can help determine the work required and the associated costs. Contact the appropriate pest control and insulation service providers to discuss your needs and obtain estimates before work begins.
Q: How long does it take to remove and replace attic insulation?
A: Many attic insulation projects can be completed within a few days. The timeline depends on the size of the attic and the amount of work involved, including pest removal, removal of the existing insulation, any necessary repairs, and installation of the replacement insulation.
Q: Is it safe to remove pest-contaminated attic insulation yourself?
A: Removing contaminated attic insulation yourself is not recommended. Insulation exposed to pests may contain bacterial and fungal pathogens that can pose health risks if appropriate protective equipment and disposal procedures are not followed. A professional pest control and insulation team can manage the removal process with appropriate precautions and dispose of contaminated material correctly.
